
How to Choose a Construction Garbage Bin Rental in 2026?
Choosing a construction garbage bin rental in 2026 requires more than comparing weekly prices. It requires matching the container to the project’s waste profile, access conditions, and local disposal rules. The U.S. Environmental Protection Agency reported approximately 600 million tons of construction and demolition debris generated in 2018. That volume was more than twice the nation’s municipal solid waste total. The figure remains a useful industry benchmark, although it is not a perfect forecast for every site.
Small details matter. A bathroom renovation may need a compact 10-yard bin for drywall, tile, and packaging. A roofing replacement may require a 20-yard container with strict weight controls. Concrete and soil can become expensive surprises because their density fills weight limits before the bin looks full. Ask about included tonnage, overage rates, delivery fees, pickup windows, and prohibited materials before signing.
The World Bank’s What a Waste 2.0 report projects global waste generation could reach 3.4 billion tonnes annually by 2050. Construction waste is only one part of that challenge, but better sorting and collection decisions can reduce unnecessary disposal. Recyclable metal, clean cardboard, untreated wood, and concrete may have different handling routes. Confirm those options with the rental provider and the receiving facility.
Experience also exposes weak assumptions. The cheapest construction garbage bin rental may not be the lowest-cost choice after overweight charges, blocked driveways, or a second haul. Measure the placement area carefully. Check overhead clearance. Leave room for safe loading. A reliable decision balances price, capacity, scheduling, and documented disposal practices. Yet every estimate deserves review when the project scope changes.
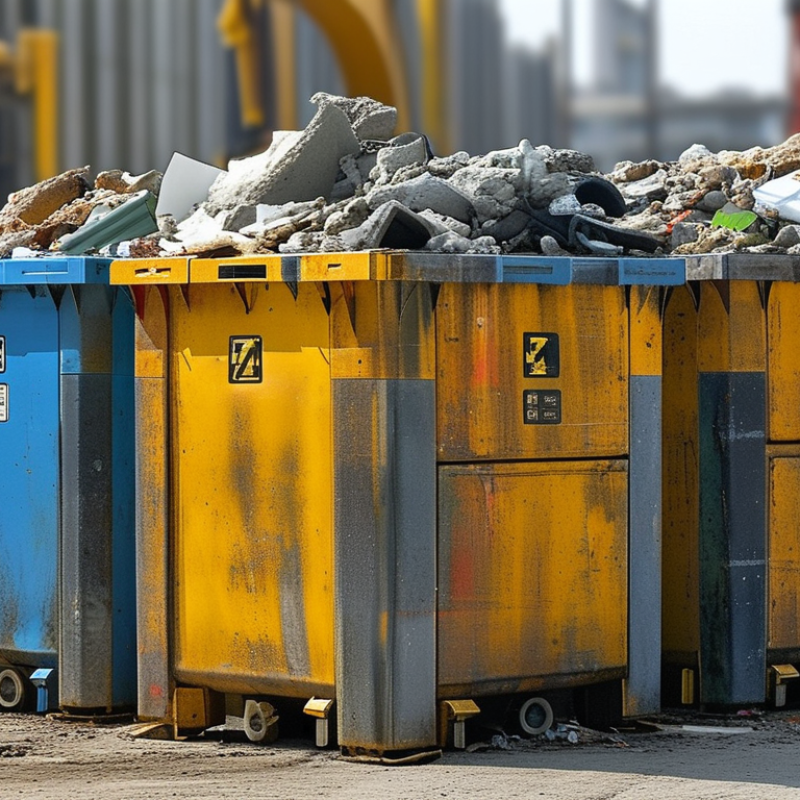
Define Your Construction Waste Volume and Bin Requirements
How to Choose a Construction Garbage Bin Rental in 2026?
Define Your Construction Waste Volume and Bin Requirements
Start with a site walk, not a guess. Measure the rooms, surfaces, and materials being removed. List drywall, timber, roofing, concrete, soil, and packaging separately. A small bathroom remodel may fill several cubic yards quickly. Broken tiles also create dense, heavy loads.
Volume is only half the calculation. Weight matters too. Concrete and soil can exceed a bin’s safe limit before the container looks full. Ask the rental provider about volume limits, weight allowances, and restricted materials. Provide honest details about your debris. This helps prevent extra charges and unsafe overloading.
My own early estimates would have been too optimistic. A renovation produced nearly twice the expected timber because damaged pieces needed replacement. Build in a modest buffer, but avoid ordering an oversized bin without reason. You may pay for unused capacity.
Check the loading area before selecting a container. Confirm the truck can reach the site, clear low branches, and place the bin on stable ground. Measure gates and driveway width. Keep debris below the rim, with doors and walkways unobstructed. If waste arrives in stages, ask whether scheduled exchanges suit the project better than one large container. Structural changes can alter your estimate, so review the bin size after demolition begins.
| Planning Dimension | Reference Data | How to Use It | Bin-Selection Implication |
|---|---|---|---|
| 1. Estimate the Waste Volume | |||
| Basic volume formula | Waste volume = material quantity × waste factor | Measure the planned material quantity and apply a waste factor for off-cuts, breakage, packaging, and demolition debris. | Use the total estimated volume as the starting point before selecting a bin. |
| Typical construction waste factors |
5–10% for controlled new construction materials 10–20% for general renovation work 20–30% for selective demolition |
Choose the range that matches the project’s level of cutting, removal, damage, and demolition. | For uncertain estimates, use the upper end of the range or add one size category. |
| Recommended planning reserve | 10–15% extra capacity | Reserve space for inaccurate measurements, unexpected debris, and bulky materials. | A 15% reserve generally reduces the risk of overflow without requiring excessive unused capacity. |
| Conversion between units | 1 cubic yard = 0.7646 cubic metres | Convert supplier bin sizes and site estimates into the same unit before comparing options. | Example: a 20-cubic-yard bin has a nominal capacity of approximately 15.29 m³. |
| 2. Common Bin Sizes and Planning Capacity | |||
| Nominal Bin Size | Approx. Capacity | Useful Planning Capacity at 80% Fill | Typical Project Fit |
| 10 yd³ | 7.65 m³ | 6.12 m³ | Small bathroom or kitchen renovation, limited flooring removal, or a concentrated load of heavy debris. |
| 15 yd³ | 11.47 m³ | 9.18 m³ | Medium interior renovation, roofing replacement, or a mixed load with moderate bulky materials. |
| 20 yd³ | 15.29 m³ | 12.23 m³ | Large renovation, apartment cleanout, roofing project, or general construction waste with moderate volume. |
| 30 yd³ | 22.94 m³ | 18.35 m³ | Major renovation, new-build construction, commercial interior work, or large quantities of bulky packaging. |
| 40 yd³ | 30.58 m³ | 24.46 m³ | Large construction or demolition projects with high-volume, relatively light materials. |
| 3. Waste Type, Density, and Loading Risk | |||
| Waste Stream | Indicative Bulk Density | Volume Characteristic | Requirement Check |
| Wood and timber off-cuts | 150–250 kg/m³ | High volume and relatively light; long pieces can reduce usable space. | Choose a larger volume bin and cut or stack long pieces safely where permitted. |
| Drywall and plasterboard | 500–700 kg/m³ | Can become dense when broken into small pieces and compacted by its own weight. | Confirm the permitted material category and any gypsum-specific disposal requirements. |
| Mixed construction waste | 300–600 kg/m³ | Density varies significantly because the load may contain wood, packaging, drywall, and masonry. | Estimate both volume and probable weight; do not rely on volume alone. |
| Concrete, brick, and masonry | 1,500–2,000 kg/m³ | Very heavy; a bin may reach its weight limit before it is full. | Use a heavy-material bin or smaller container and confirm the supplier’s weight limit before loading. |
| Soil and excavated material | 1,400–1,800 kg/m³ | High weight per cubic metre and may retain moisture, increasing total load weight. | Confirm whether soil is accepted and request a weight-based recommendation. |
| 4. Practical Selection Calculation | |||
| Example project estimate | 16 m³ of mixed renovation waste | Add a 15% planning reserve: 16 m³ × 1.15 = 18.4 m³. | The next suitable nominal size is normally a 30 yd³ bin, providing approximately 22.94 m³ of nominal capacity. |
| Heavy-load check | Estimated weight = volume × bulk density | For 16 m³ of mixed waste at an assumed 450 kg/m³: 16 × 450 = 7,200 kg. | Confirm the actual permitted payload, truck limits, road restrictions, and disposal rules before ordering. |
| Fill-height requirement | Load level should remain below the rim | Keep debris level with or below the top edge and secure loose or lightweight materials. | Overflow can create safety, transport, and regulatory problems; it may also require an additional collection. |
| 5. Final Rental-Requirement Checklist | |||
| Material separation | Keep concrete, soil, clean wood, drywall, and mixed waste separate where possible. | Separated loads are easier to price, recycle, and match with suitable equipment. | Ask whether separate bins or special handling are required. |
| Placement area | Allow room for delivery access, truck clearance, and safe loading. | The bin must sit on a stable surface without blocking emergency access, utilities, or required walkways. | Check local permits and site-access restrictions before delivery. |
| Rental duration | Match the rental period to the demolition and cleanup schedule. | Include expected delays caused by weather, inspections, subcontractor availability, or phased work. | Confirm extension fees, collection notice requirements, and exchange timing. |
| Weight and prohibited materials | Rules vary by jurisdiction and waste facility. | Hazardous materials, liquids, asbestos-containing materials, batteries, tires, and chemicals may require separate handling. | Obtain written acceptance rules and weight limits before placing the order. |
| Planning note: The density figures are indicative bulk-density ranges, not guaranteed load weights. Actual density depends on moisture, compaction, particle size, and the material mix. Bin dimensions, permitted payloads, fill rules, accepted materials, and local regulations vary by location and supplier; verify these details before rental. | |||
Related Posts
-
7 Best Construction Trash Container Rental Options?
-
10 Essential Tips for Choosing the Right Construction Site Dumpster Rental
-
Top Construction Waste Bin Rental Services in China Today?
-

10 Best Construction Waste Bin Rentals for Your Next Project
-
Top 5 Construction Trash Bin Rental Options for Your Projects?
-

Top 10 Benefits of Construction Waste Bin Rental for Your Project Success