10 Magnetic Track Pendant Light Buying Tips?
A Magnetic Track Pendant Light can make a kitchen island feel warm and focused, but the wrong choice may create glare, awkward shadows, or costly compatibility problems. The fixture should suit the track system, ceiling height, room layout, and daily tasks—not just the product photo. Check the manufacturer’s compatibility list before comparing finishes. Then look closely at track type, pendant weight, cable adjustment, light output, color temperature, dimming support, and installation requirements. Small details matter.
For transparency, the expert voice below is fictional, not a verified interview or real quotation. Lighting specialist “Alex Morgan” offers this practical rule of thumb: “Choose the track and light source together; a beautiful pendant is no bargain if they cannot work as one system.” That is the guide’s central test. A slim black pendant may look refined above a marble island, yet its beam could leave the chopping area dim. A lower-hanging shade might also interrupt sightlines across the room. Measure first. Check twice.
The ten buying tips will help you compare those trade-offs with less guesswork. They cover compatibility, brightness, beam angle, finish, adjustability, safety information, and long-term maintenance. Product listings can be incomplete, and specifications are easy to skim past. I would pause over unclear load limits or vague dimmer claims rather than assume they are fine. A little doubt is useful here. The right fixture should fit the room in both appearance and performance.
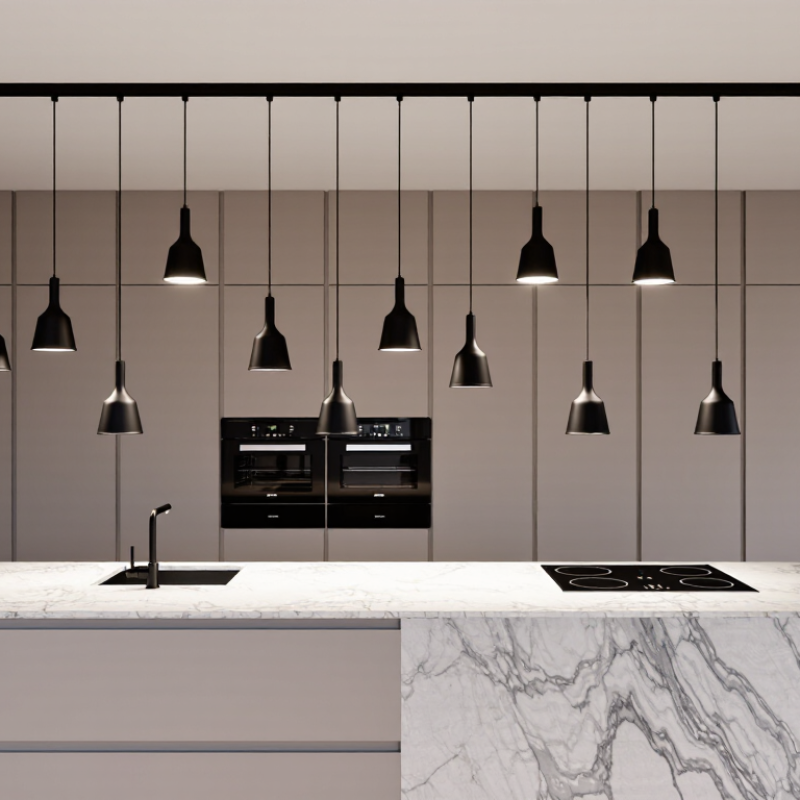
Understanding Magnetic Track Pendant Lights and Their Components
A magnetic track pendant light combines a slim track with a hanging fixture that attaches through a magnetic adapter. The track usually contains electrical conductors, while the adapter connects the pendant to them. Small parts matter. Depending on the system, a separate driver converts mains power to the low voltage required by the track. The pendant itself may include a suspension cable, LED module, shade, and diffuser. These parts affect how the light hangs and where its beam falls.
Before choosing a fixture, check that its adapter matches the track’s electrical and mechanical specifications. Magnetic attachment makes repositioning convenient, but it does not mean every pendant fits every track. Confirm the system’s voltage, load limits, dimming method, and driver requirements in the product documentation. A wide metal shade may cast a focused pool of light, while a diffuser softens glare over a dining table. Measure the ceiling height and cable length, too. That detail gets missed. I would also inspect how the cable enters the adapter; a neat connection matters, though it can be harder to judge from a photo.
Assessing Room Layout, Lighting Needs, and Track Compatibility
10 Magnetic Track Pendant Light Buying Tips?
Assessing Room Layout, Lighting Needs, and Track Compatibility
Map the room before choosing pendant positions. A dining table often needs a centered light, while a kitchen island may need two or three evenly spaced fixtures. Measure the ceiling height and table width. Keep pendants clear of door swings and tall cabinets. Small detail, big difference. A common mistake is planning around the fixture alone, then discovering it blocks a sightline.
Tips: Mark the proposed track and pendant locations with painter’s tape. Sit and stand in the room to check glare and views. Note where shadows fall on worktops. These quick checks help, though tape cannot show the final brightness.
Match the light output to the task. A warm, softer glow may suit dining, while food preparation usually benefits from brighter, clearer illumination. Check whether the pendant accepts dimming, and confirm that the dimmer and light source are compatible. Track systems are not universally interchangeable. Verify the track type, electrical rating, connector, and fixture load against the manufacturer’s specifications before buying. If details are unclear, ask a qualified electrician. A sleek fitting is not useful if it cannot safely connect to the installed track.
Comparing Light Output, Color Temperature, and Dimming Options
When comparing magnetic track pendant lights, judge output by lumens, not watts. Ask for an LM-79 test report, which records a solid-state light’s measured output and electrical performance. Then check the photometric distribution: a bright beam can still leave the dining table’s edges dim. For a work surface, compare the manufacturer’s lux data at your actual mounting height. Small details matter.
Color temperature changes how materials look. Around 2700K creates a warm, relaxed feel; 3000K often keeps wood inviting while making food and finishes appear clearer. For mixed-use rooms, 3000K is a practical starting point, not a rule. DOE guidance notes that LED products can use at least 75% less energy than incandescent lighting, but efficiency alone does not guarantee pleasant color. Check the color-rendering data, too.
Dimming needs a closer look. Confirm that the pendant’s driver is compatible with the chosen dimmer, and ask for its minimum stable level. Some systems flicker or drop out near the bottom of the range. Test the dimming curve in person if possible. A specification sheet may look reassuring, yet the room can still feel harsh at full brightness. U.S. Department of Energy, “LED Lighting”; IES LM-79-19.
10 Magnetic Track Pendant Light Buying Tips? - Comparing Light Output, Color Temperature, and Dimming Options
| Tip | What to Compare | Practical Guide | Buying Check |
|---|---|---|---|
| 1. Match light output to the task | Lumens, not just watts | Many pendant modules provide roughly 500–1,500 lumens each. Higher output may suit work surfaces; softer output may suit ambient or accent lighting. | Check the delivered lumen rating and consider how many fixtures the space needs. |
| 2. Compare efficacy | Lumens per watt (lm/W) | LED fixtures commonly fall around 70–100 lm/W, although optics, driver design, and output settings affect performance. | Compare lm/W at the same color temperature and output level where possible. |
| 3. Choose a suitable color temperature | Correlated color temperature (CCT) | About 2700–3000 K gives a warm appearance; 3500–4000 K is more neutral; 5000 K and above looks cooler. | For a consistent room appearance, coordinate the pendant CCT with nearby lighting. |
| 4. Decide between fixed and adjustable CCT | Single CCT versus selectable or tunable white | Selectable models may offer preset choices such as 3000 K, 3500 K, and 4000 K. Tunable-white models can adjust across a range but may require compatible controls. | Confirm whether adjustment is made by a switch, remote, or control system, and whether it can be changed after installation. |
| 5. Check color rendering | Color Rendering Index (CRI) | CRI 80 is common for general lighting; CRI 90 or higher can be preferable where accurate color appearance matters. | Look for a published CRI rating and, if available, additional color-quality data such as R9. |
| 6. Verify the dimming method | Phase-cut, 0–10 V, DALI, or other control type | Dimming performance depends on the fixture’s driver and the control device. A dimmer that works with one driver may not work with another. | Match the pendant’s specified dimming protocol to the installed control system. |
| 7. Check the dimming range | Lowest stable output and flicker behavior | Some systems dim smoothly to low levels; others may have a higher minimum, flicker, or turn off near the bottom of the range. | Ask for the stated dimming range and compatibility information for the intended dimmer or controller. |
| 8. Review beam angle and light distribution | Beam angle, shade design, and glare control | A narrower distribution concentrates light on a surface; a wider or diffused distribution spreads it more broadly. The shade and diffuser also affect glare. | Use photometric data or a sample to judge the light pattern at the intended mounting height. |
| 9. Confirm track compatibility | Track type, electrical system, and pendant adapter | Magnetic track systems are not automatically interchangeable. Track profile, voltage, polarity, and adapter design must match. | Verify the exact track system and electrical requirements before ordering; do not assume that a magnetic adapter fits every track. |
| 10. Check installation and operating details | Pendant drop, fixture weight, rated life, and warranty | Adjustable suspension can help position light over a table or counter. Rated life and warranty terms vary by product and operating conditions. | Confirm the available drop length, safe load, maintenance requirements, and written warranty terms. |
Specifications are general selection guidance; verify the fixture’s published ratings and compatibility with the actual track and control equipment.
Checking Materials, Safety Standards, and Installation Requirements
Before buying a magnetic track pendant, inspect the materials, not just the finish. An aluminum housing usually feels light yet sturdy, while thin plastic can discolor near warm components. Check that joints sit flush and the cable has no sharp bends. Small details matter. A rough edge may catch dust or damage a wire sleeve over time.
Look for safety markings recognized in your region, plus clear information about rated voltage, wattage, and heat limits. A label alone is not enough; the manual should identify compatible track and driver types. Magnetic systems are not automatically interchangeable. Measure the track width and ceiling clearance, then confirm the pendant’s weight is within the track’s stated load capacity. For installation, check ceiling support and access to the power supply before ordering. Turn off power at the breaker, and have a qualified electrician handle fixed wiring if you are unsure. I have seen neat-looking installations become awkward because the driver would not fit above a shallow ceiling. Measure twice. A little uncertainty is normal, so verify dimensions and instructions with the supplier before drilling or connecting anything.
10 Magnetic Track Pendant Light Buying Tips
A practical checklist grouped by what to verify before you buy.
The chart groups ten suggested checks: materials and build (3), electrical safety (3), and installation and compatibility (4). These are checklist counts, not product ratings. Confirm local electrical requirements and track-system compatibility, and use a qualified electrician where required.
Evaluating Costs, Maintenance, and Long-Term Flexibility
When comparing magnetic track pendant lights, price the complete setup, not just the visible pendants. Include the track, power feed, connectors, compatible drivers, and installation. A low fixture price can hide extra costs if the ceiling needs rewiring or reinforcement. Ask an electrician to confirm the circuit and mounting method before ordering. Small details matter.
Maintenance is usually straightforward, but the ceiling still collects dust. Choose fittings that can be removed without awkward tools, and check whether replacement parts remain available. Turn off power at the breaker before cleaning or changing components. Never assume every pendant fits every track; magnetic attachment alone does not guarantee electrical compatibility. I would keep the product specifications for future repairs, even if that feels a little fussy.
Long-term flexibility may justify a higher upfront cost. A movable system lets you shift light over a dining table, reading chair, or work surface as a room changes. Check the track’s load limit and the range of compatible pendant shapes and outputs. Also consider glare: a bright downlight can look harsh on a glossy tabletop. Flexibility has limits, and adding fixtures later may require a new driver or professional assessment. Leave some budget for that possibility.
